RodBot - 3D Printer

RodBot - 3D Printer
This project started out as a small upgrade to a kit 3D printer I bought but ended up as a complete printer.
It is designed around a frame of M10 threaded rods for stability, which is where the name come from as well. All plastic parts are printable and are made to be sturdy for stability.
The weakest link I found in the kit printer I started out with was that many printed parts where mounted together to form a bigger part. I tried to avoid this by making the parts as big as necessary and only mounting hardware like rods and bearing blocks. This will of course mean more material is needed and the total weight of the printed parts is around 900 grams.
The X-carriage was designed to fit a Greg's Wade reloaded or my remix of Minimalistic Mk7 replacement
It's probably possible to use other extruders using the 50 mm hole distance as well.
Some of the parts needed:
- M10 threaded rods + nuts and washers
- M8 threaded rods + nuts and washers
- M6 threaded rods + nuts and washers
- 8 mm Smooth rods
- SC8UU bearing blocks
- RepRap PCB Heatbed, I'm using this one
Note: Some parts might need to be rotated in order to print them.
The frame blocks are designed to work with this [Heavy duty Vibration damper](http://www.thingiverse.com/thing:94279 )
I have made a 3D PDF of the printer available for download
Updates:
2015-01-03: Some changes have been made since the last update. The biggest are:
- New heatbed: Helios Heat Bed kit
- New extruder: Bulldog XL Extruder
- Changed Z-axis threaded rods to trapezoidal lead screw
- Adjustable belt tensioner for the X-axis
All these changes has made the printer better and more importantly it seems like it's more reliable. All the new files are available on the Github page.
2014-05-30: The Y-axis is now modified to use 8 mm smooth rods so that those are the only rods used for the whole printer and SC8UU are used everywhere. I also modifided the design of the Y-motor mount to be able to print it flat (prints faster) and tried to make it more robust. I recommend printing the Y-motor mount at 100% infill. The new parts are:
- Y Motor Mount Rev 2
- Y Smooth Rod Ends - Rev 2.1
- Y Belt Holder Rev 2
2014-05-13: The Marlin configuration I'm using with the RAMPS controller is available on Github. I've also moved old compenent no longer used on the newest version of RodBot to an archive folder here.
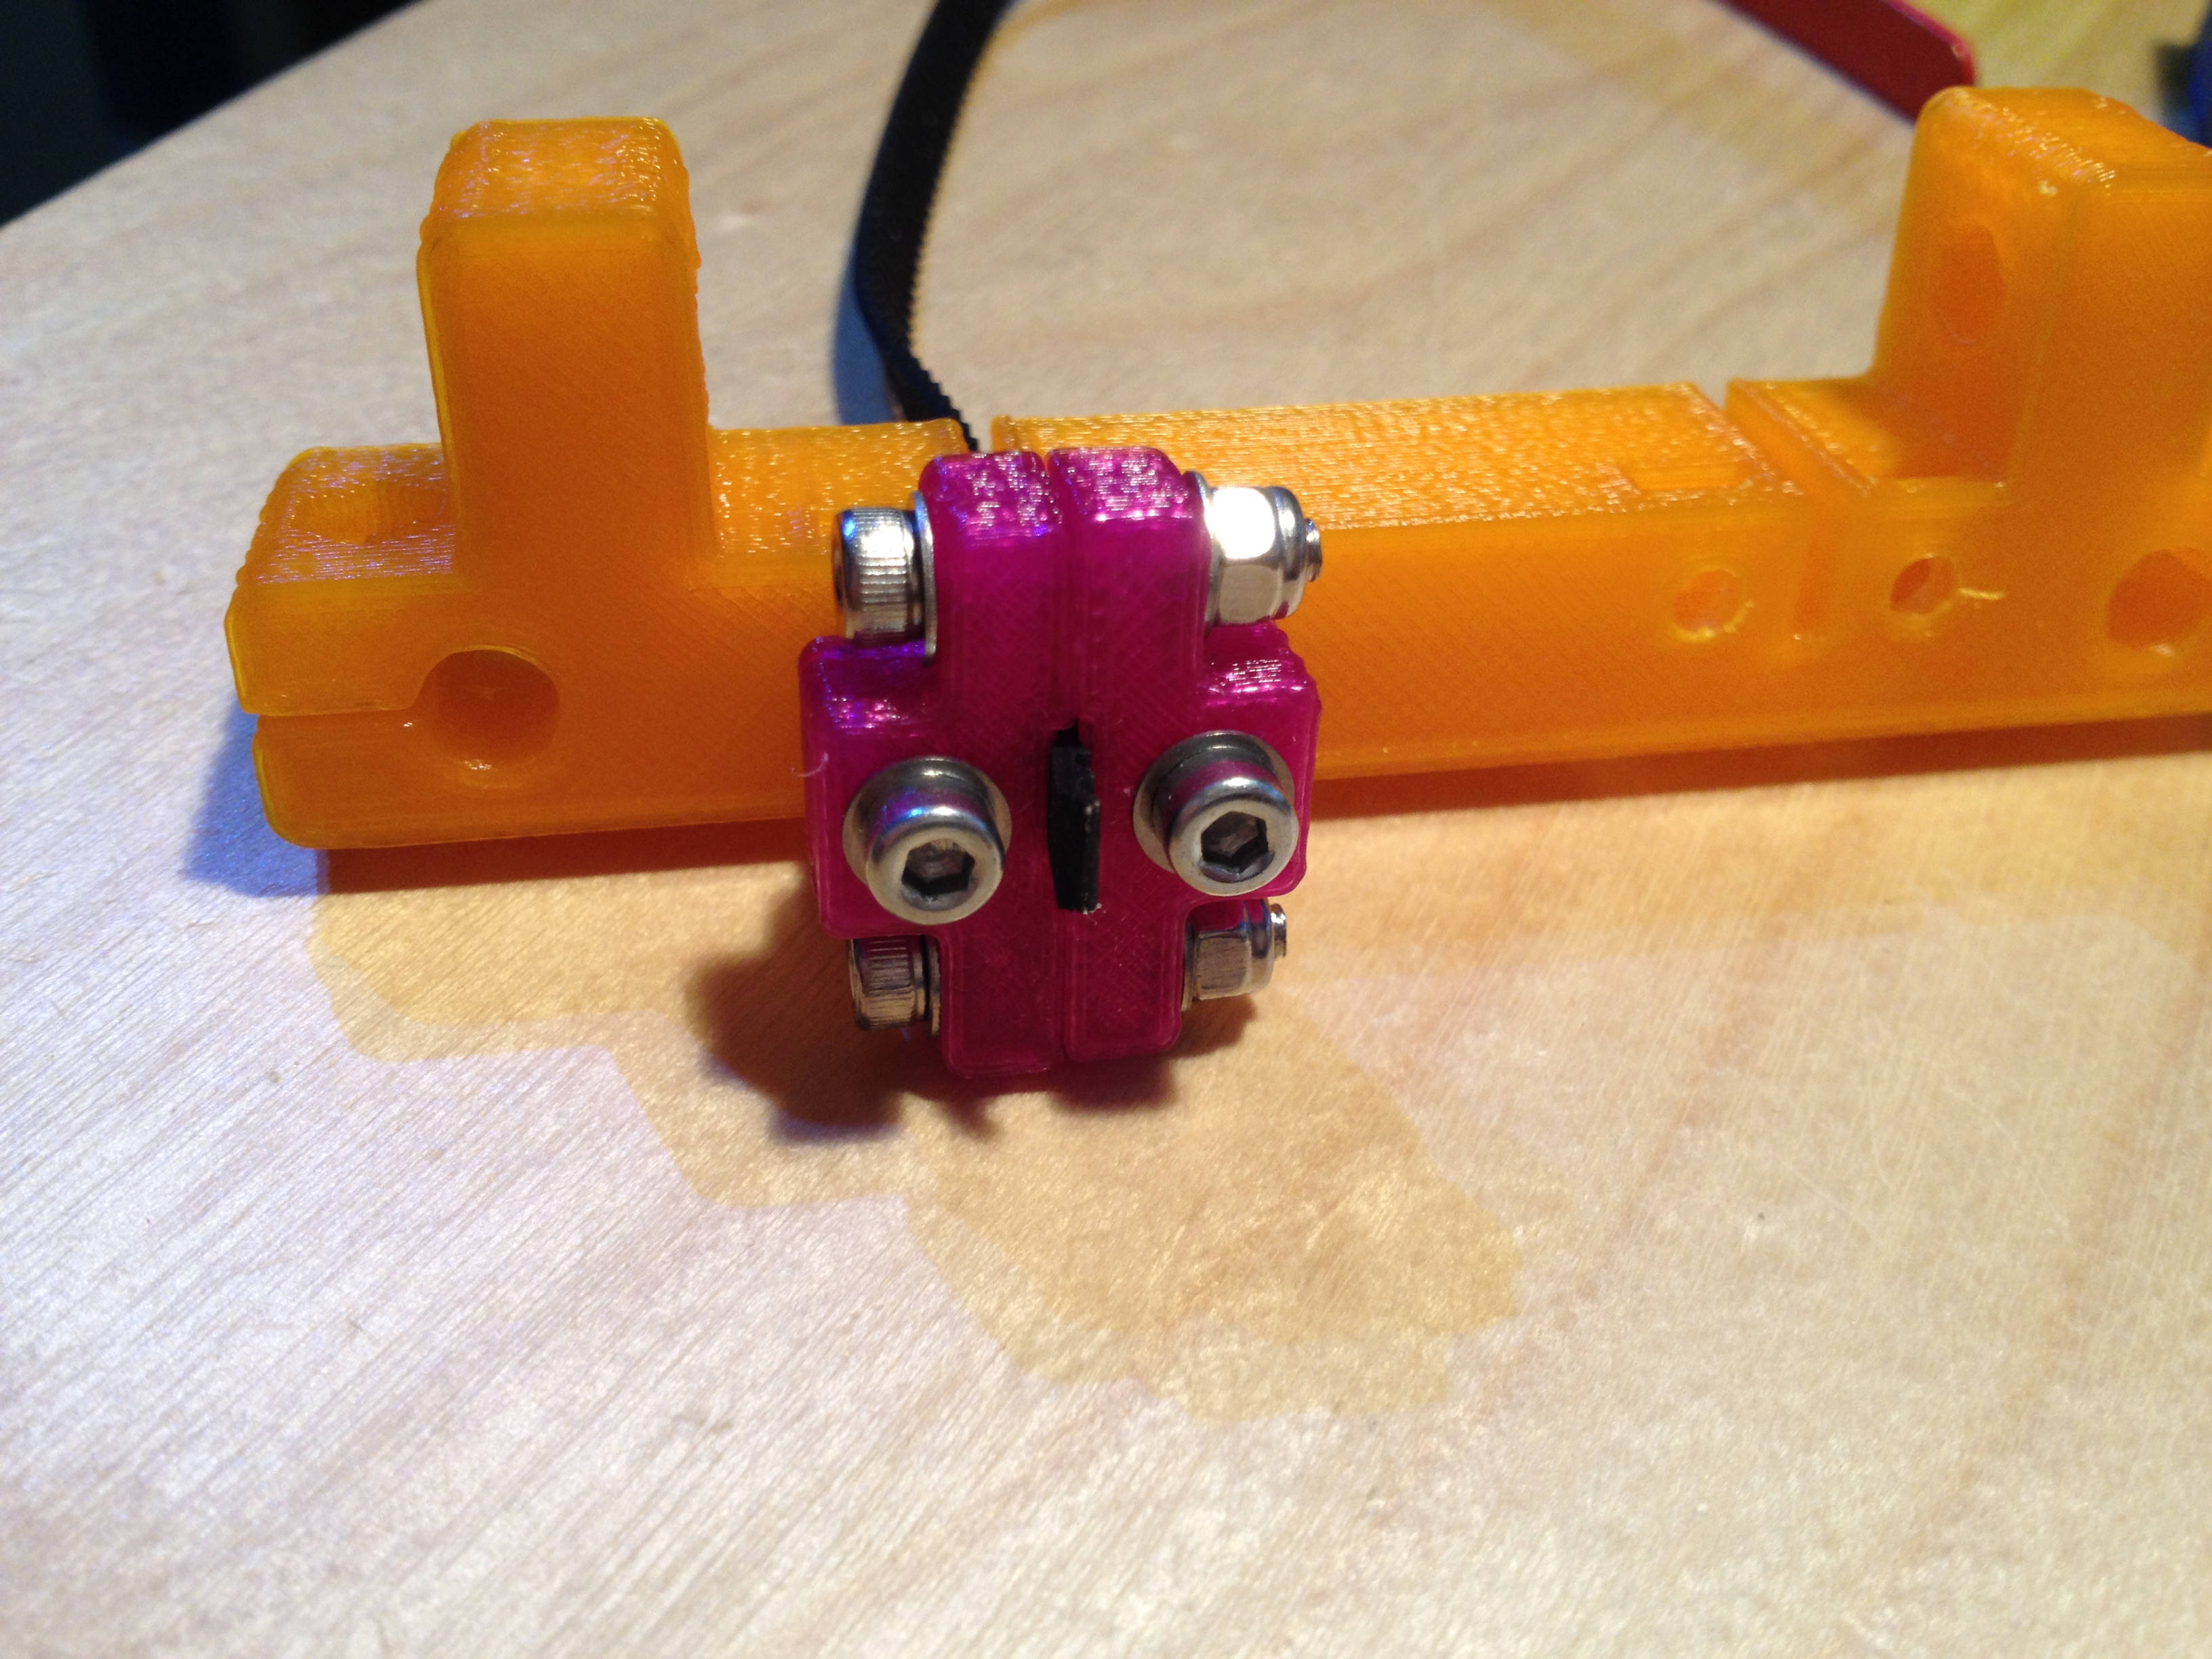
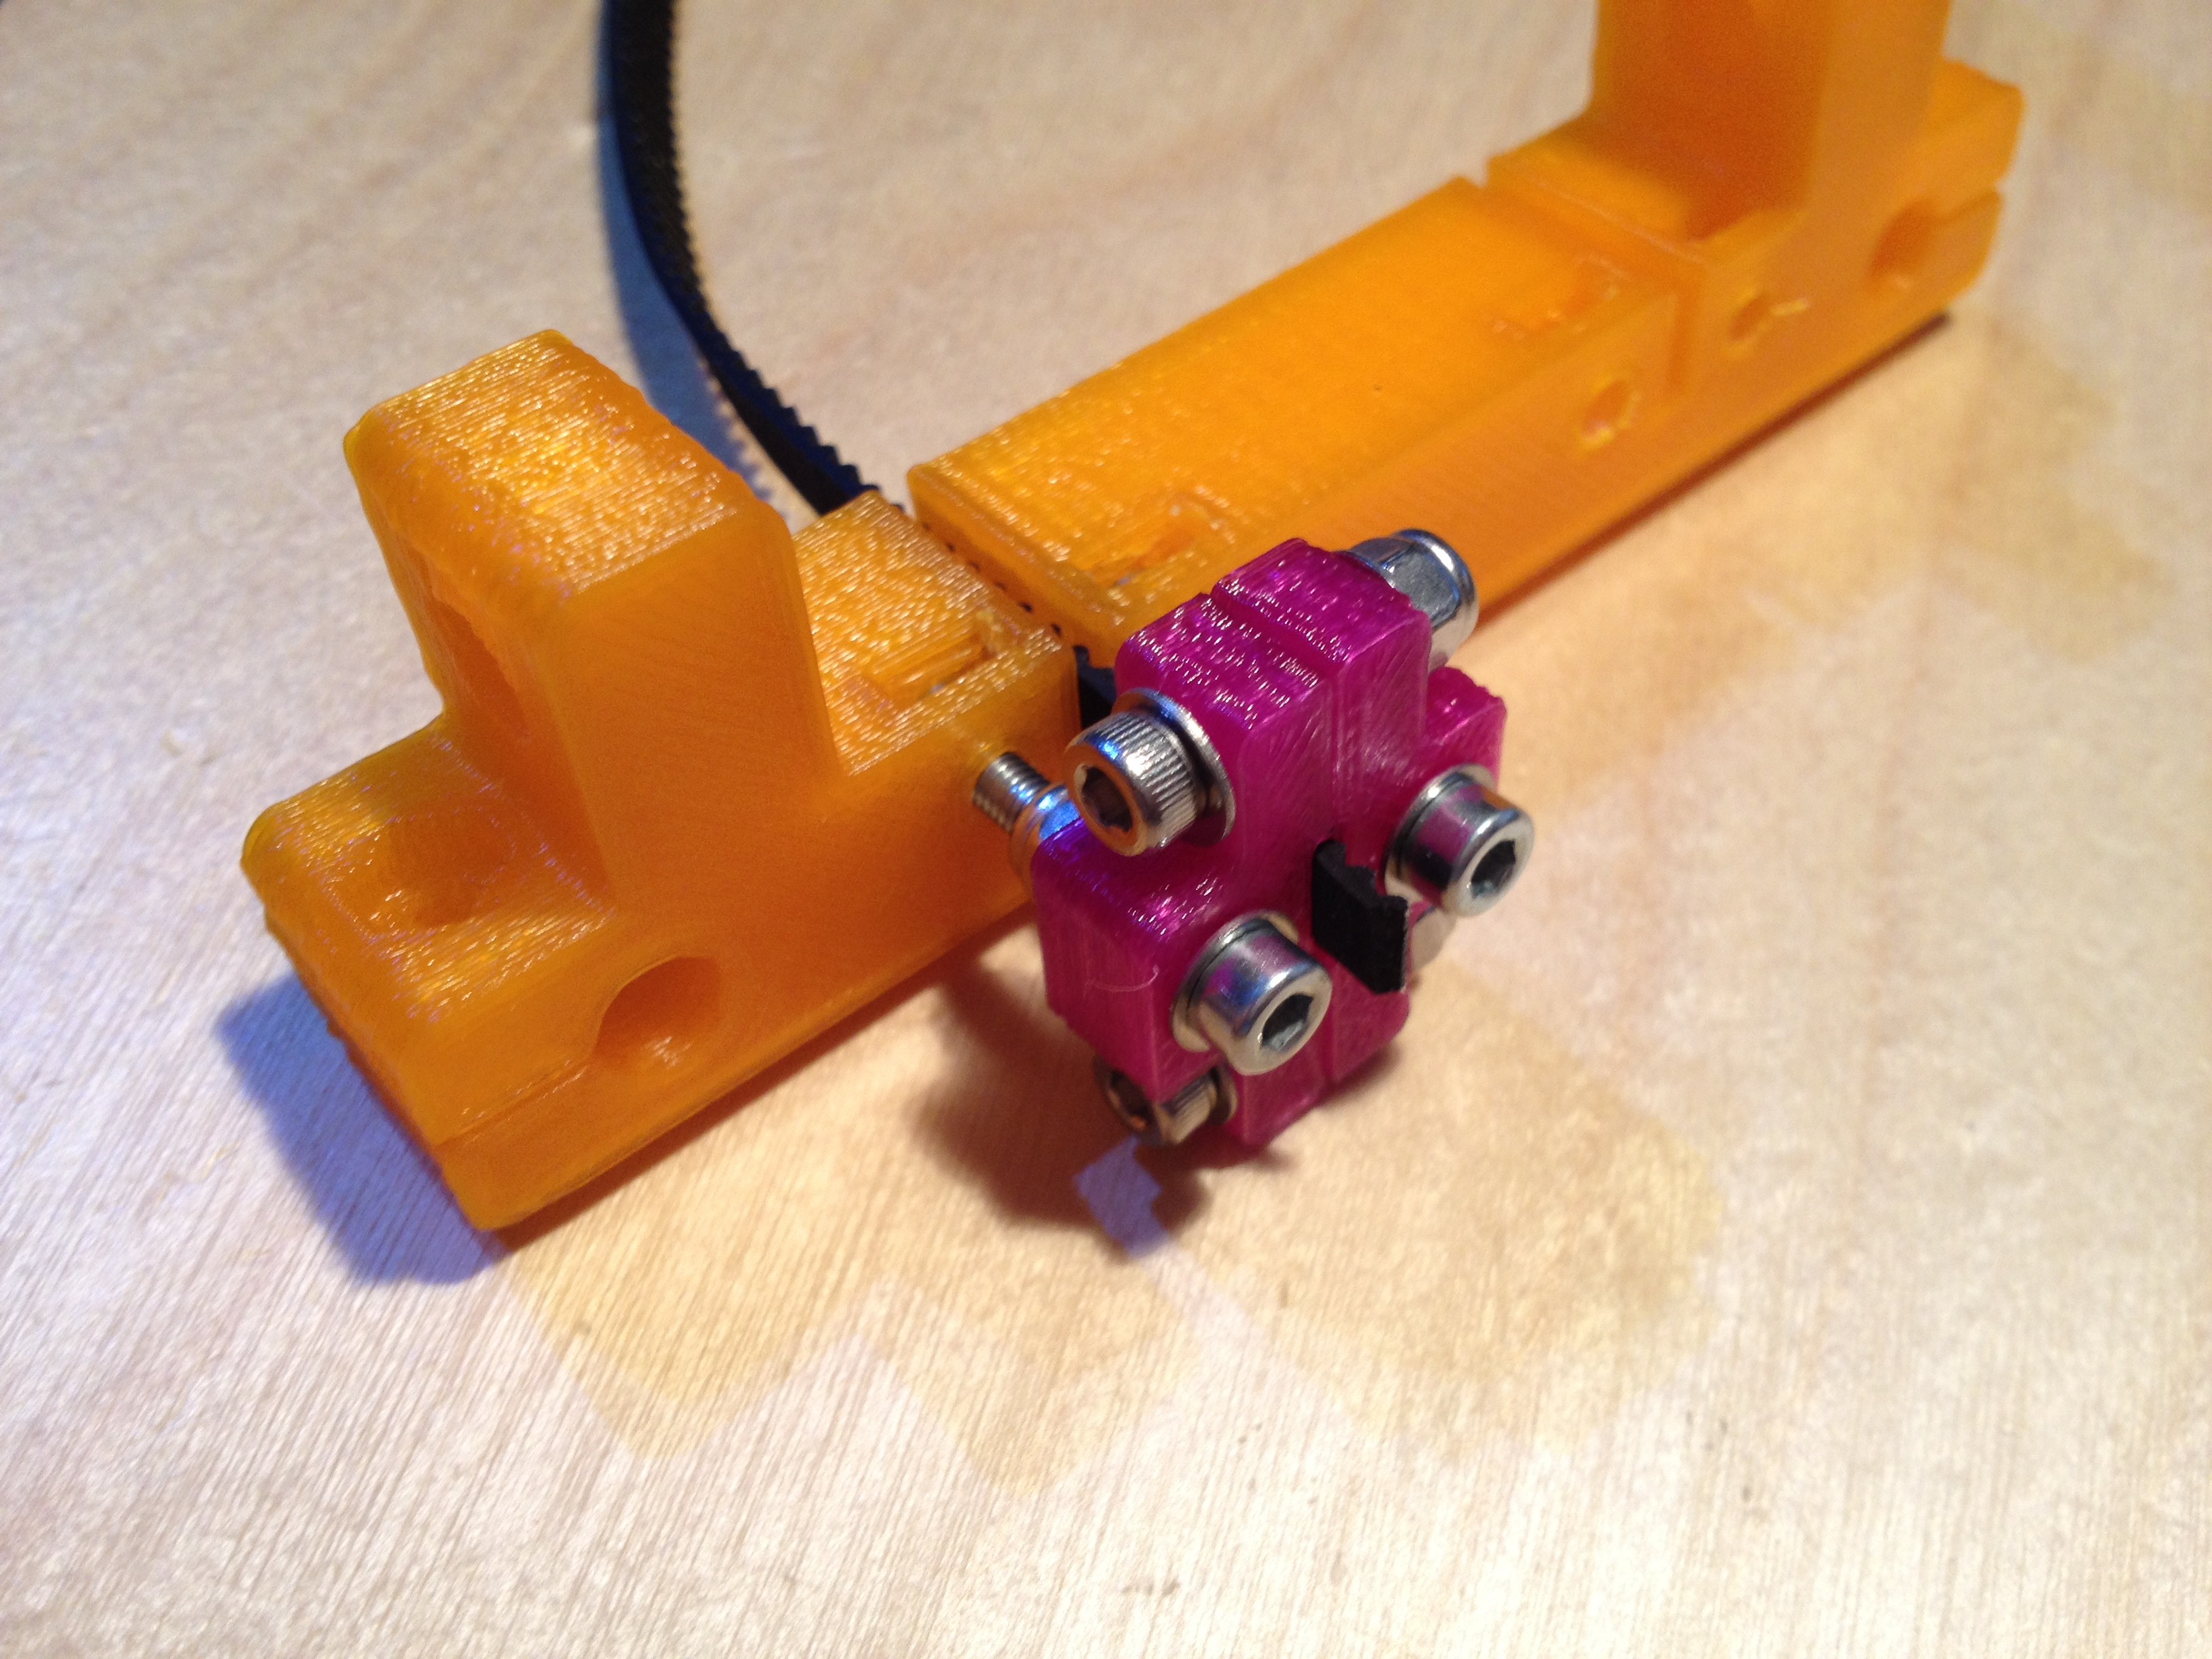
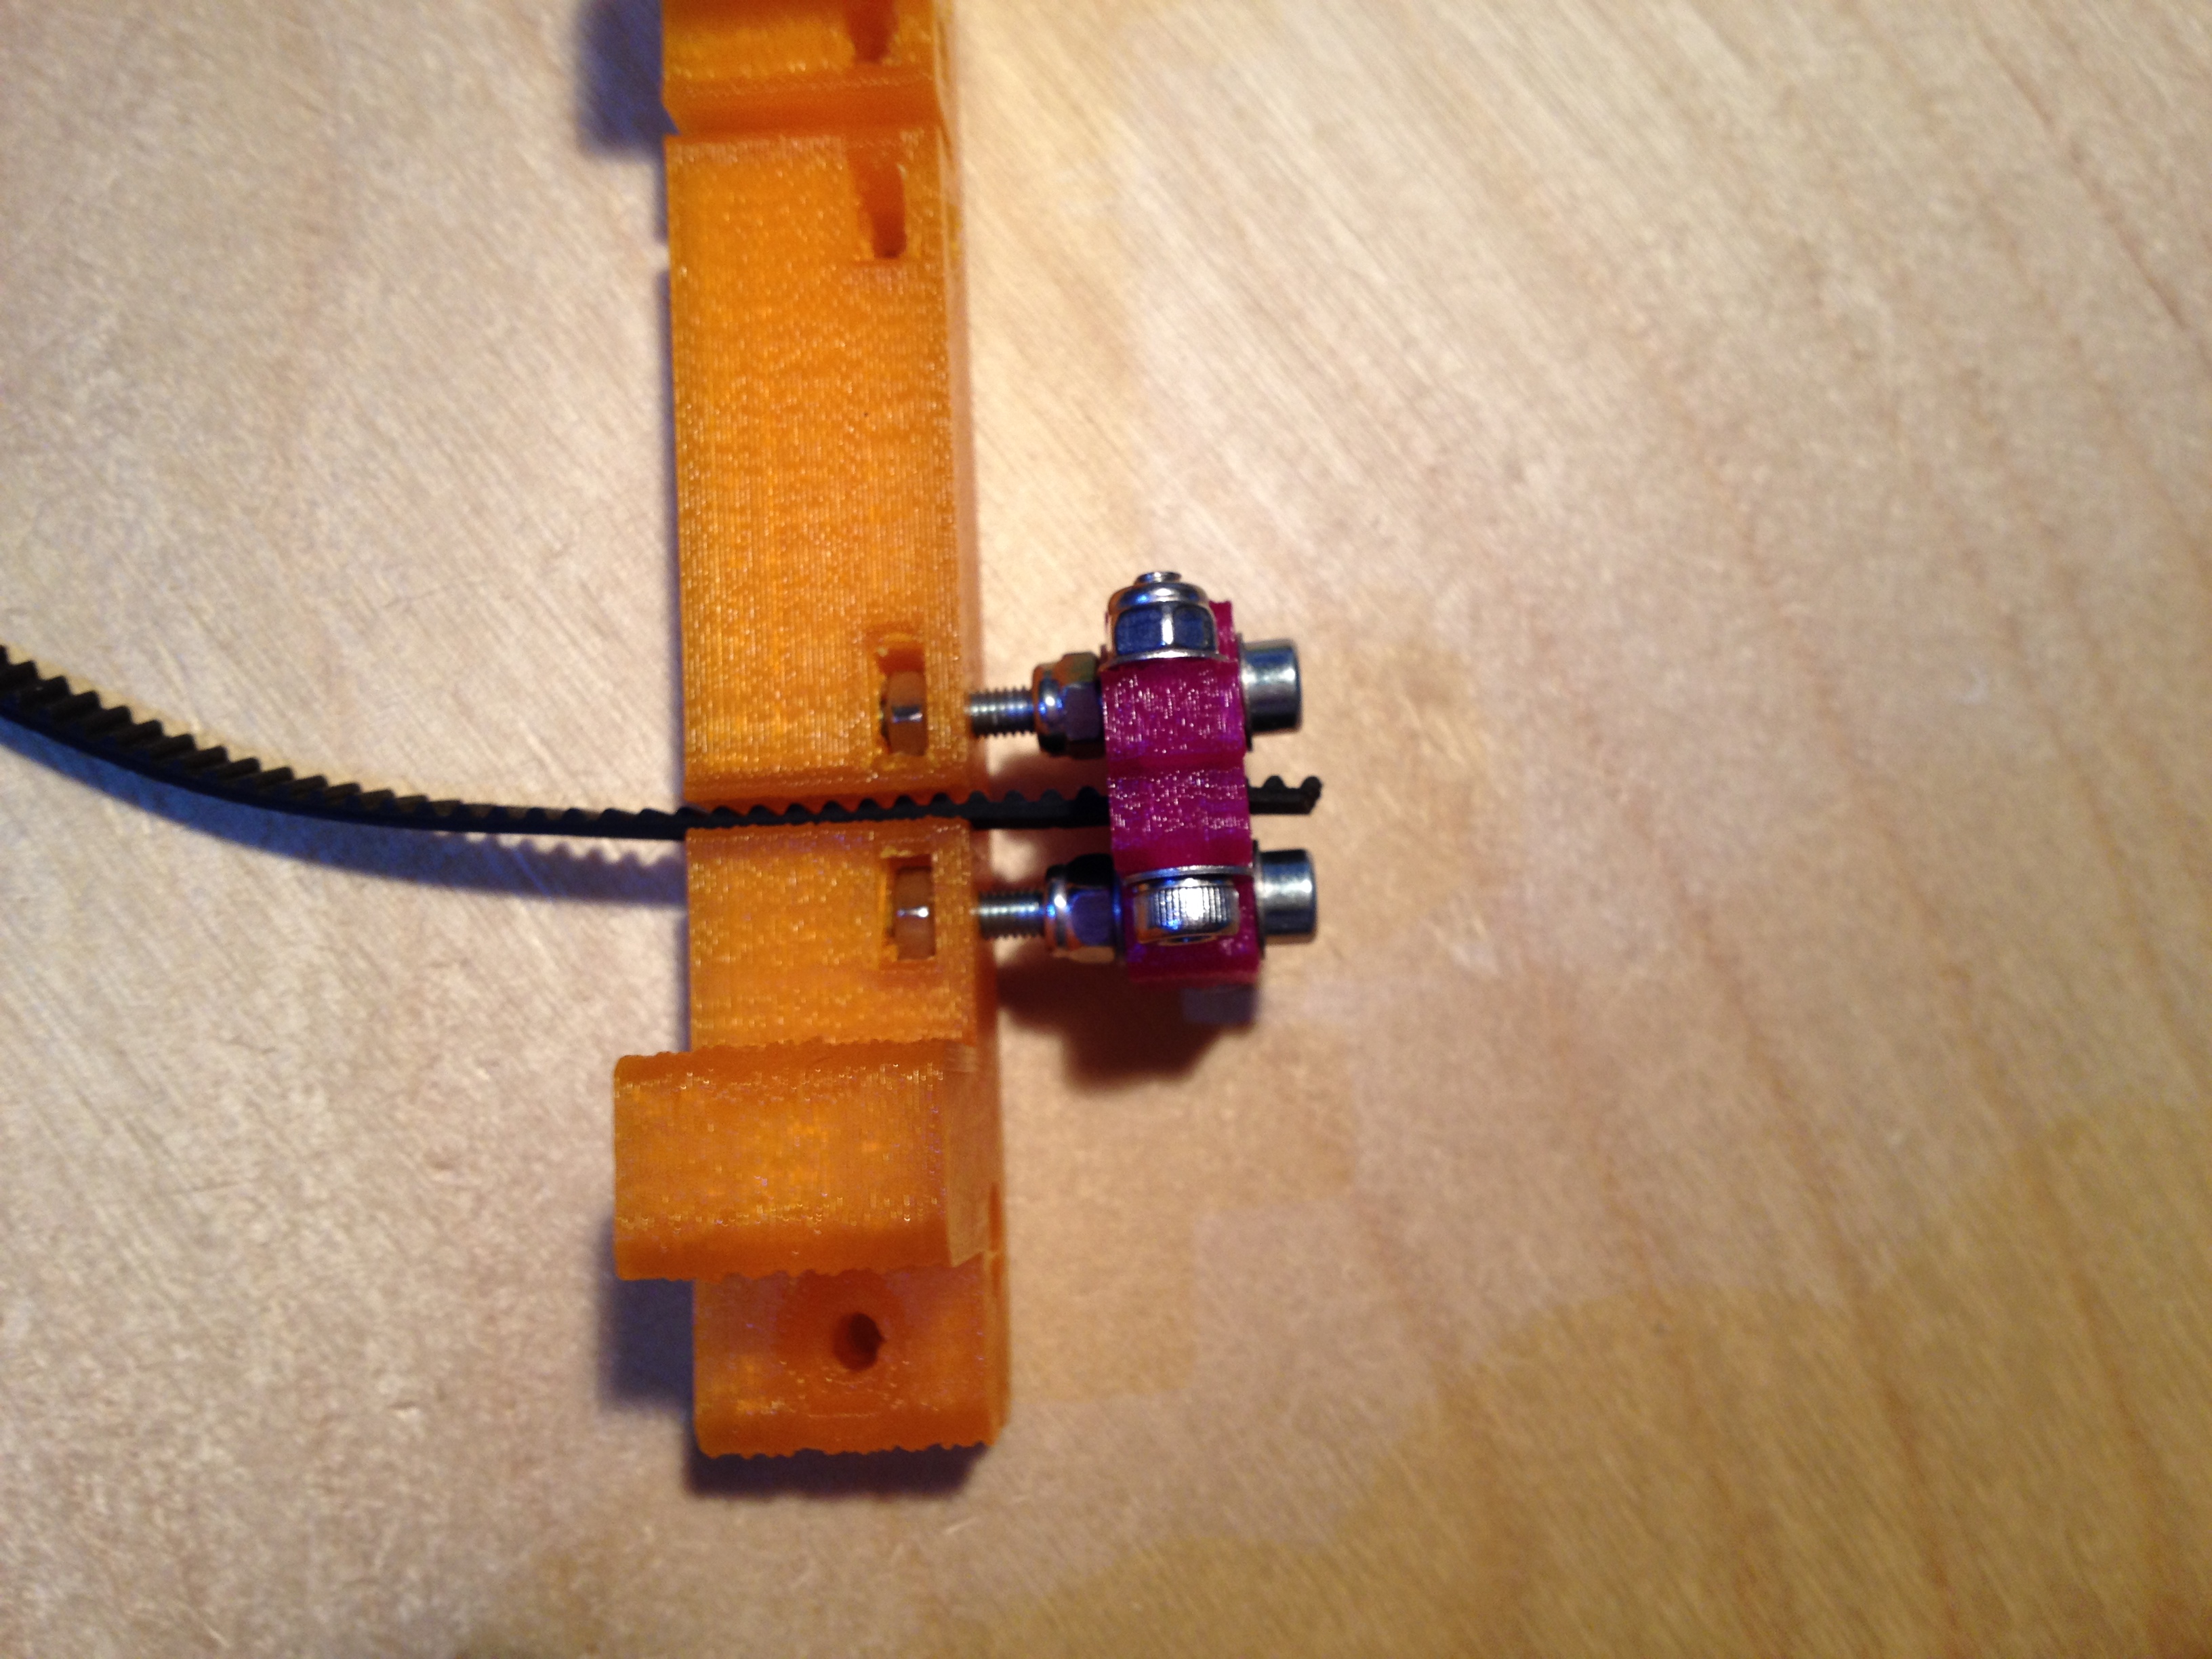
2014-05-12: Modified the Y ends to have a easier and more robust clamp for the belt. It is now easier to adjust the tension as it's just a matter of turning to screws. This also removes the problem I had with the plastic holding the belt cracking. The new parts are:
- Y Smooth Rod Ends - Rev 2
- Y Belt Holder
Hardware needed: - 2 pcs M3x25mm or longer
- 2 pcs M3x16mm
- 4 pcs M3 Lock nut
- 2 pcs M3 nut
- 8 pcs M3 washer
Some photos of the assembly: Photo 1, Photo 2, Photo 3.
2014-05-08: All files are available on GitHub along with some development and some old files as well.
2014-04-30: I recently replaced my J-Head hotend with an E3D hotend but I needed to widen the x assembly by 5 mm in order to fit it. The new parts for the wider x-assembly are:
- X Carriage Rev 3
- X-End Idler Clamp Rev 2
- X-End Idler Rev 2
- X-End Motor Clamp Rev 2
- X-End Motor Rev 2
To secure the E3D Hotend I'm using this mount from dmarett. See the pictures I've taken for more details.
2014-03-29: The fan mount I designed didn't work very well so I have now replaced it with this, which is a remix of this one but with a slightly modified mount to fit on the two screws for the belt holders.
License
This work is licensed under a Creative Commons Attribution-ShareAlike 4.0 International License.