Revomaze Mapper Ver. 2

If you like what you see here, consider leaving a tip.
Warning:
Using a mapper will defeat most of the challenge Revomaze puzzles have to offer. Only use a mapper once you've pulled out most of your hair, and are suffering from recurring Revomaze nightmares.
The first version of the Revomaze mapper flipped the orientation of the core maze horizontally and vertically, making it difficult to understand and solve certain dynamic puzzle elements. This version correctly matches the position and orientation of the core maze by moving the map from the sleeve to the core, and the pen from the core to the sleve.
I used M4X20 and M4X40 socket head cap screws, 2 washers, and 2 nylon lock nuts for assembly.
Assembly:
- Print the test piece and check the fit of your pen in the hole before printing the larger pieces. Make any necessary changes to the model and print all the the pieces.
- Insert one bolt, washer, and lock nut in the map holder and leave the screw loose. Do the same for the pen holder holder.
- Cut a strip of paper 45 mm wide and place it on the map holder.


- Tape the paper in place while holding the paper tightly to the map holder. Make sure your pen will write on the tape you choose. Use a sharp knife to remove the ends of the paper on the inside of the map holder.


- Place the map holder on the side of the puzzle with the dot marker, aligning the gap with the serial number on the puzzle's core. Tighten the bolt with enough pressure to keep the map holder in place, but not so tight that it breaks the plastic. This is a 3D printed part after all.

- Rotate the map holder until the space opposite the gap lines up with the dot on the puzzle. Hold the map holder and puzzle still while placing the pen holder on the opposite side of the puzzle. Rotate the pen holder util it lines up with the gap in the map holder. Tighten the bolt, again being careful not to over tighten and damage the printed part. This alignment will indicate when the puzzle is in the solved position when the pen arrives back at the gap in the paper. If the pen is above the puzzle, the dots will be at the bottom position, and the pin should fall from the sleeve to the core, and the core can be removed. A few light taps may be needed to coax the pin out of the sleeve.


- Cut a rubber band and tie loops in the ends. Place the pen retaining piece on a ball point pen, and place the elastic loops on the hooks of the pen holder. Hook the elastic under the arm of the handle and insert the pen

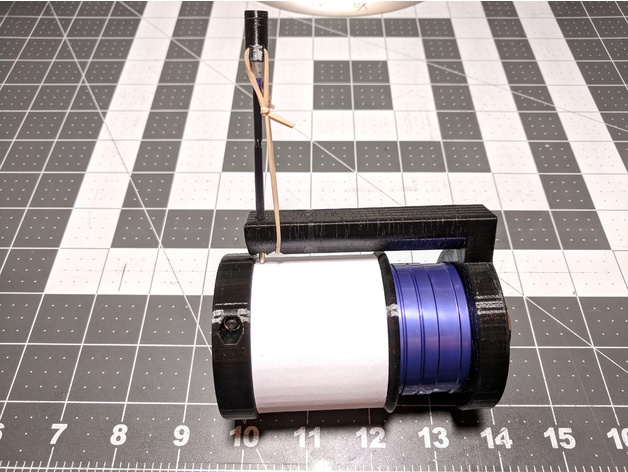
- Solve the puzzle!